Categories
Wordpress

Hooks on WordPress Edit Post Admin Page

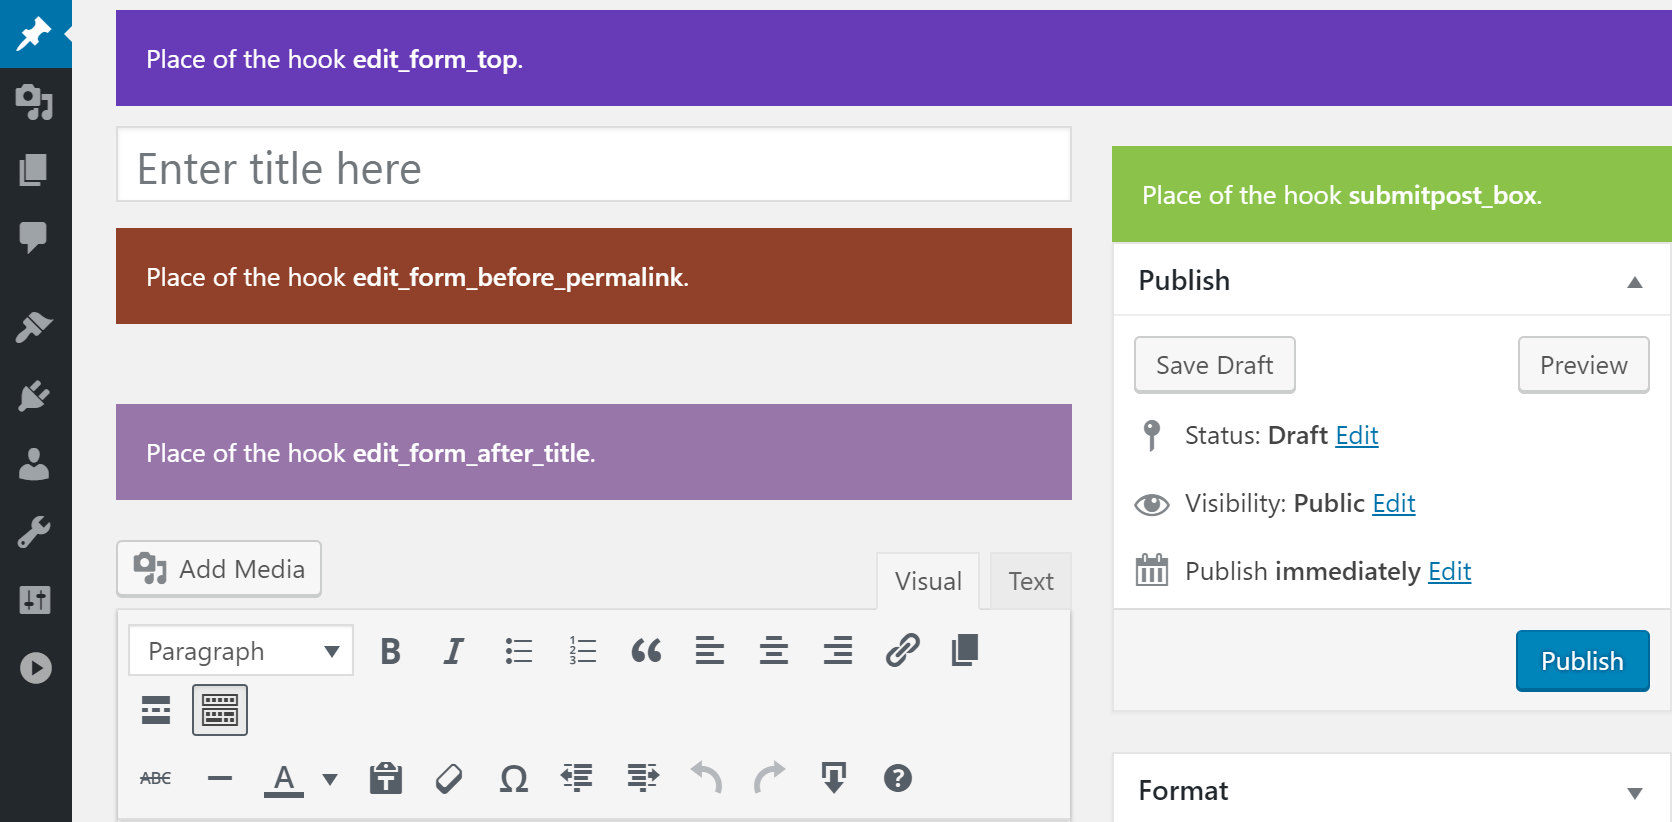
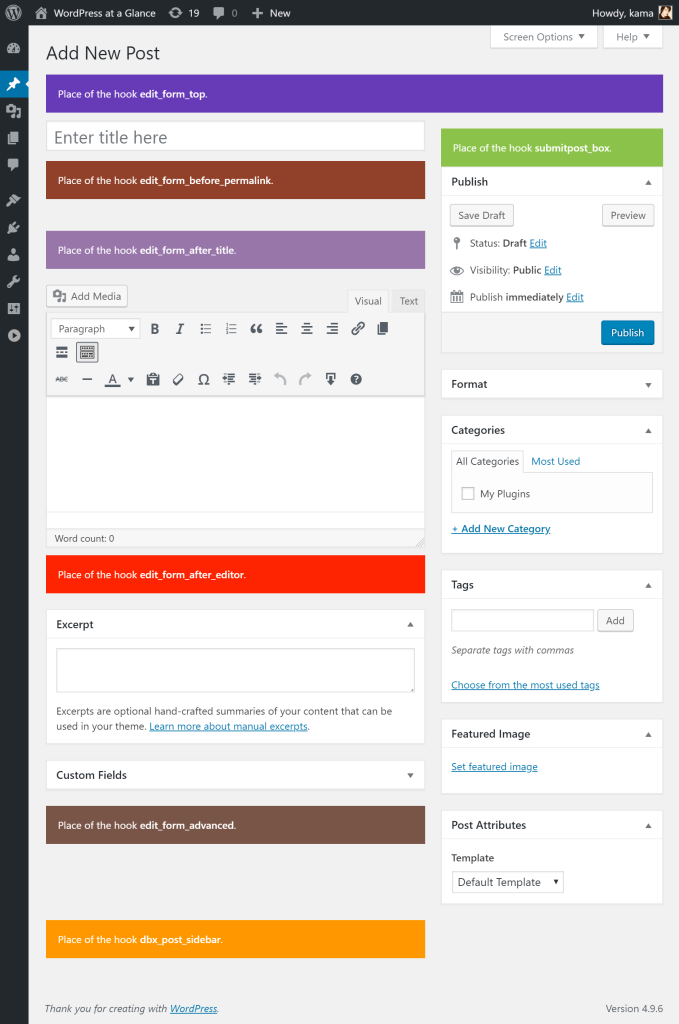
There are hooks that allow you to display any content in a particular place on the admin page of adding or editing any type of post.

Thanks to hooks below, you can make the publication more convenient. All depends on your programming skills and imagination. For example:

  • Place video or text right before the visual editor with tips on writing content.
  • Show images already attached to the post as a slider.
  • Show photos from Google by keyword so you can choose one of them for a thumbnail.
  • Display a calculator for counting calories, if you publish a recipe post.
  • And much more that require your certain task and allow programming skills.

Hooks map

A visual representation of where and what kind of hook is used.

Categories
Code

How to install ImageMagick on Centos7 + nginx + php-fpm?

ImageMagick is a free software suite used for editing, creating, composing, or converting bitmap images. By using ImageMagick, it is easy to read and write images in so many formats like GIF, JPEG, PNG, Postscript, and TIFF.ImageMagick is also used to resize, flip, mirror, rotate, distort, shear and transform images.This tutorial helps you to install ImageMagick in an easy method.

Categories
Code

Embed Gists with a URL

https:https://thinhcoi.com/wp-content/uploadshttps://thinhcoi.com/wp-content/uploadsgist.github.comhttps://thinhcoi.com/wp-content/uploads85a3b0535b68be598ee2.git

Categories
Tối ưu Server Wordpress

Config WP Super cache and Nginx

Standard WordPress-Nginx configuration with WP Super cache support:

As you are getting into Nginx, I hope you don’t need my help with configuring WP Super Cache plugin.

Still, make sure you are using “Use mod_rewrite to serve cache files. (Recommended)” option under “Advanced” tab.

Following configuration supports:

  1. Static Page Caching using Disk
  2. Direct browser cache for static content like images, js, css, etc

    https:https://thinhcoi.com/wp-content/uploadshttps://thinhcoi.com/wp-content/uploadsgist.github.comhttps://thinhcoi.com/wp-content/uploads21c4b021871d7607d8b1.git

    Note:

    To simplify configuration, I haven’t added Mobile user agent checks. We are in the iPhone era where finally phones are getting smart. So there is no need to create separate mobile site, when you can cater to today’s iPhonehttps://thinhcoi.com/wp-content/uploadsAndroid devices using responsive designs.

    Don’t Forget:

    Always test your Nginx configuration and then reload it. All changes to Nginx config must be followed with these commands:

    nginx -t && service nginx reload
    Important Note:

    WP Super Cache caching will conflict with plugins that uses query vars. WooCommerce is an example known plugin known to work with above configuration. Reason is following line:

    try_files https://thinhcoi.com/wp-content/uploadswp-contenthttps://thinhcoi.com/wp-content/uploadscachehttps://thinhcoi.com/wp-content/uploadssupercachehttps://thinhcoi.com/wp-content/uploads$http_hosthttps://thinhcoi.com/wp-content/uploads$cache_urihttps://thinhcoi.com/wp-content/uploadsindex.html $uri $urihttps://thinhcoi.com/wp-content/uploads https://thinhcoi.com/wp-content/uploadsindex.php ;
    It doesn’t passes $args to https://thinhcoi.com/wp-content/uploadsindex.php. If you set last try_files argument to https://thinhcoi.com/wp-content/uploadsindex.php?$args as with other WordPress-Nginx configuration, WP Super Cache, itself will break!

Categories
Wordpress

[Plugin] Rút gọn link cho wordpress với Go.gl

Code rút gọn link dành cho blog wordpress dùng dịch vụ Go.gl của Google.

Paste code bên dưới vào file functions.php hoặc viết thành 1 plugin.

Updated: https:https://thinhcoi.com/wp-content/uploadshttps://thinhcoi.com/wp-content/uploadswordpress.orghttps://thinhcoi.com/wp-content/uploadspluginshttps://thinhcoi.com/wp-content/uploadsgooglhttps://thinhcoi.com/wp-content/uploads (đã có plugin trên wordpress.org)

https:https://thinhcoi.com/wp-content/uploadshttps://thinhcoi.com/wp-content/uploadsgist.github.comhttps://thinhcoi.com/wp-content/uploads595349c4b5af5880310f.git

Categories
Code

How to make website registration easier using facebook accounts

 – See more at: http:https://thinhcoi.com/wp-content/uploadshttps://thinhcoi.com/wp-content/uploadsaniri.rohttps://thinhcoi.com/wp-content/uploadsgeekhttps://thinhcoi.com/wp-content/uploadstutorialshttps://thinhcoi.com/wp-content/uploadshow-to-make-website-registration-easier-using-facebook-accountshttps://thinhcoi.com/wp-content/uploads#sthash.zKgOnpD4.dpuf

What are we going to build?
In this tutorial we will learn how we can facilitate user registration but letting users register to our site using their facebook accounts. This way, they won’t have to fill in any data, just grant the app access to their facebook account and that’s it! Their new account is created and they can easily login to our website.

We will be making calls to facebooks Graph API in order to retrieve the necessary information. In case you are not familiar with it, you might want to take a look at the documentation to get an idea of what it does.

You can view the working demo of what we are going to build here.

The tutorial will have two parts: the first will cover the basic signuphttps://thinhcoi.com/wp-content/uploadslogin issues, the second will cover the extra features we will add to our app (viewing friends info and posting on the wall).

Let’s get started!

Getting started
You would be using this is you have a website  that users can register to and you want to make the registration easier for them by allowing them to register with their facebook accounts. In the tutorial, I will only show you how to use facebook accounts for registration, not how to add this to your existing registration. But it shouldn’t be difficult to integrate if you understand the tutorial. If you have questions on that, just ask.

For this tutorial you will need some basic PHP and Javascript knowledge.

Creating a new facebook app
The first thing we have to do is create a new facebook app. To do this, go 
here and chose to create a new app. You will get to the screen when you have to fill in the app info. The screen will look something like this:

As you can see in the screenshot, you will have to fill in the following: